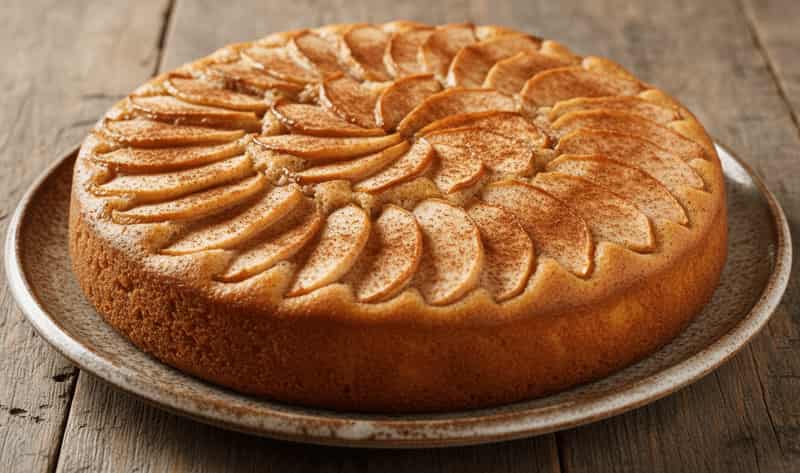
Jamie Oliver’s apple cake is a beautifully simple bake that highlights the natural sweetness and softness of apples. It’s moist, lightly spiced, and comforting—exactly the kind of cake you want with a cup of tea or as a casual dessert after dinner.
What makes this cake stand out is its balance: soft sponge, juicy apple pieces, and just enough sweetness to feel indulgent without being heavy. It’s a reliable recipe that works across seasons and occasions.
This recipe serves about 8 people and takes roughly 50–60 minutes from start to finish. In this guide, I’ll walk you through each step in detail so you can bake a perfectly soft and flavorful apple cake every time.
What Makes This Recipe Worth Making
- Moist and tender texture
The apples release moisture during baking, keeping the cake soft and preventing dryness. - Naturally sweet and balanced
Apples reduce the need for excessive sugar, making the cake feel lighter. - Simple pantry ingredients
No complicated items—just everyday baking essentials. - Perfect for any time of day
Works as breakfast, snack, or dessert depending on how you serve it. - Easy to customize
You can adjust spices, add nuts, or include different fruits.
What Is Jamie Oliver’s Apple Cake?
Jamie Oliver’s apple cake is a soft sponge cake made with fresh apples folded into a lightly sweet batter, often flavored with warm spices and baked until golden.
Jamie Oliver Apple Cake Ingredients List
- 200g plain flour
- 150g sugar
- 2 eggs
- 100g butter (melted) or oil
- 100ml milk
- 2–3 apples (peeled and chopped or sliced)
- 1 teaspoon baking powder
- 1 teaspoon cinnamon
- Pinch of salt
Optional additions:
- Vanilla extract
- Chopped nuts (walnuts or almonds)
- Brown sugar topping
How to Prepare Jamie Oliver Apple Cake – Simple Steps
Step 1: Preheat the Oven and Prepare the Tin
Preheat your oven to 180°C (350°F). Grease and line a cake tin to prevent sticking and ensure easy removal after baking.
Step 2: Mix Dry Ingredients Evenly
In a bowl, combine flour, baking powder, cinnamon, and salt. Mixing these first ensures even distribution of the leavening and spices.
Step 3: Whisk Wet Ingredients
In another bowl, whisk eggs and sugar until slightly pale. Add melted butter (or oil) and milk, mixing until smooth and well combined.
Step 4: Combine Wet and Dry Mixtures
Gradually add the dry ingredients into the wet mixture. Stir gently until just combined—avoid overmixing to keep the cake light.
Step 5: Add the Apples
Fold in the chopped or sliced apples. Make sure they are evenly distributed throughout the batter for consistent texture and flavor.
Step 6: Transfer to the Tin
Pour the batter into the prepared tin and level the top. You can arrange a few apple slices on top for a decorative finish.
Step 7: Bake the Cake
Bake for 35–45 minutes until golden on top and a toothpick inserted in the center comes out clean. The cake should feel firm but still soft.
Step 8: Cool Before Serving
Allow the cake to cool in the tin for a few minutes before transferring to a rack. Cooling helps the structure set properly.
Common Mistakes to Avoid When Making Jamie Oliver Apple Cake
- Using too much liquid from apples
Can make the cake soggy. - Overmixing the batter
Leads to a dense texture. - Cutting apples too large
Affects even baking. - Not preheating the oven
Results in uneven rise. - Overbaking
Dries out the cake.
Delicious Side Dishes to Serve With Jamie Oliver Apple Cake
- Vanilla ice cream
Adds a creamy contrast to the warm cake. - Custard sauce
Enhances comfort and richness. - Whipped cream
Light and airy pairing. - Greek yogurt
Balances sweetness with tang. - Caramel drizzle
Adds indulgence.
Expert Tips to Get Jamie Oliver’s Apple Cake Right
- Use slightly tart apples
Balances sweetness and enhances flavour. - Chop apples evenly
Ensures consistent baking. - Don’t overfill the tin
Allows proper rising. - Test doneness in the center
Ensures even baking. - Let the cake rest before slicing
Improves texture.
How to Add More Flavour to Apple Cake
- Add nutmeg or cloves
Deepens spice profile. - Use brown sugar instead of white
Adds caramel notes. - Add lemon zest
Brightens flavor. - Include raisins or dried fruit
Adds texture and sweetness. - Add a streusel topping
Creates a crunchy layer.
How to Adjust Jamie Oliver’s Apple Cake for Kids
- Reduce spices slightly
Keeps flavor mild. - Use sweeter apples
Makes it more appealing. - Add chocolate chips
Creates a fun twist. - Cut into smaller portions
Easier to serve.
Best Way to Store Apple Cake Leftovers
- Store in airtight container
Keeps fresh for 2–3 days. - Refrigerate for longer storage
Extends shelf life up to 5 days. - Wrap slices individually
Maintains moisture. - Freeze if needed
Lasts up to 2 months.
Best Ways to Reheat Apple Cake Leftovers
- Microwave briefly
Softens and warms quickly. - Oven reheating
Restores texture. - Add a little butter or syrup
Enhances moisture. - Serve warm for the best taste
Improves flavour and aroma.
Nutritional Value (Per Serving)
- Calories: ~280 kcal
- Carbohydrates: ~40g
- Protein: ~5g
- Fat: ~11g
- Fiber: ~3g
FAQs
What apples are best for apple cake?
Slightly tart apples like Granny Smith or Braeburn work best.
Can I make apple cake without butter?
Yes, you can use oil as a substitute.
Why is my apple cake dense?
It’s usually due to overmixing or too much moisture.
Can I make this cake ahead of time?
Yes, it stores well and can be made a day in advance.
Final Words
Jamie Oliver’s apple cake is a timeless recipe that delivers comfort, simplicity, and flavor in every slice. It’s easy to prepare, adaptable, and perfect for everyday baking. Once you make it, it quickly becomes a regular favorite.
More recipes to add to your list
PrintJamie Oliver Apple Cake
Jamie Oliver’s apple cake is a soft sponge cake made with fresh apples folded into a lightly sweet batter, often flavored with warm spices and baked until golden.
- Prep Time: 15
- Cook Time: 40
- Total Time: 55 minutes
- Yield: 6-8 1x
- Category: Dessert
- Method: Baking
- Cuisine: British
Ingredients
-
- 200g plain flour
-
- 150g sugar
-
- 2 eggs
-
- 100g butter (melted) or oil
-
- 100ml milk
-
- 2–3 apples (peeled and chopped or sliced)
-
- 1 teaspoon baking powder
-
- 1 teaspoon cinnamon
-
- Pinch of salt
Optional additions:
-
- Vanilla extract
-
- Chopped nuts (walnuts or almonds)
-
- Brown sugar topping
Instructions
Preheat your oven to 180°C (350°F). Grease and line a cake tin to prevent sticking and ensure easy removal after baking.
In a bowl, combine flour, baking powder, cinnamon, and salt. Mixing these first ensures even distribution of the leavening and spices.
In another bowl, whisk eggs and sugar until slightly pale. Add melted butter (or oil) and milk, mixing until smooth and well combined.
Gradually add the dry ingredients into the wet mixture. Stir gently until just combined—avoid overmixing to keep the cake light.
Fold in the chopped or sliced apples. Make sure they are evenly distributed throughout the batter for consistent texture and flavor.
Pour the batter into the prepared tin and level the top. You can arrange a few apple slices on top for a decorative finish.
Bake for 35–45 minutes until golden on top and a toothpick inserted in the center comes out clean. The cake should feel firm but still soft.
Allow the cake to cool in the tin for a few minutes before transferring to a rack. Cooling helps the structure set properly.


