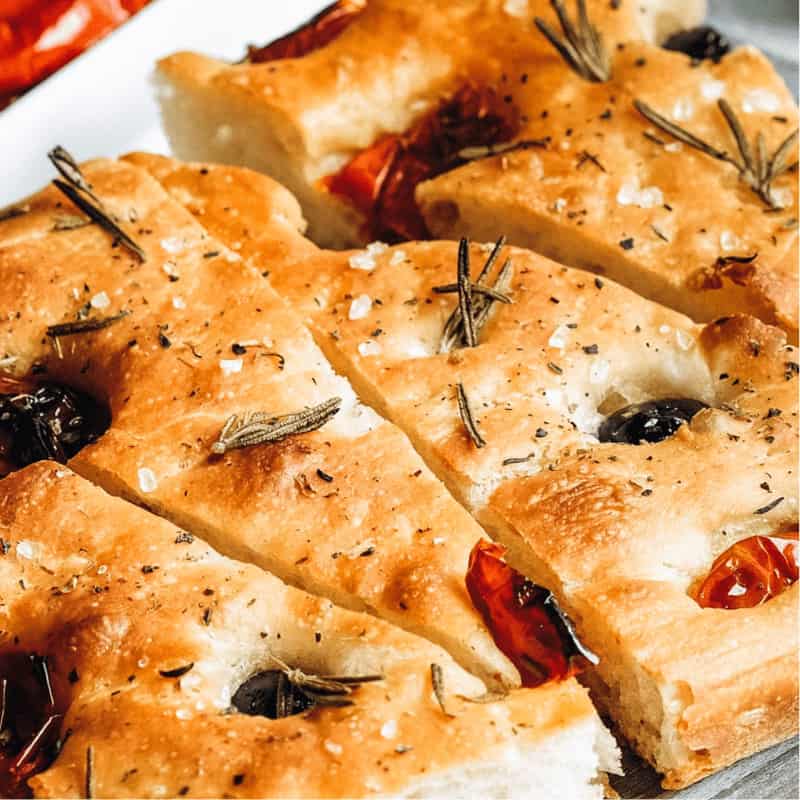
Jamie Oliver’s focaccia bread is a beautifully rustic Italian-style bread with a soft, airy crumb and a golden, olive-oil-rich crust. It’s known for its signature dimples, which hold pools of olive oil and herbs, creating flavour in every bite. This focaccia is simple in ingredients but rewarding in technique, producing a loaf that feels bakery-quality yet achievable at home.
What makes this Jamie Oliver focaccia bread special is its balance of crisp edges and fluffy interior. It works just as well served warm alongside meals as it does sliced for sandwiches, dipping, or sharing at the table.
What Makes This Jamie Oliver Focaccia Bread Worth Making
- Soft, pillowy texture inside with a lightly crisp, golden surface
- Olive oil-forward flavour that feels rich without being heavy
- Versatile bread suitable for dipping, sandwiches, or sharing
- Impressive results with basic ingredients, no specialist equipment needed
- Perfect base for toppings like rosemary, garlic, olives, or tomatoes
What Is Jamie Oliver’s Focaccia Bread?
Jamie Oliver’s focaccia bread is an Italian flatbread made from yeast dough, generously enriched with olive oil and baked in a tray. The dough is dimpled before baking, allowing oil and herbs to settle into the surface, giving the bread its distinctive look and flavour.
Jamie Oliver Focaccia Bread Ingredients List
- 500g strong white bread flour
- 7g dried yeast
- 1 teaspoon sugar
- 1½ teaspoons sea salt
- 325ml warm water
- 4 tablespoons extra virgin olive oil, plus extra for drizzling
- Fresh rosemary leaves (optional)
- Flaky sea salt for topping

How to Prepare Jamie Oliver Focaccia Bread – Simple Steps
Step 1: Activate the Yeast
Pour the warm water into a large bowl, add the yeast and sugar, and stir gently. Leave for 5–10 minutes until the surface looks slightly foamy, which shows the yeast is active.
Step 2: Make the Dough
Add the flour, salt, and olive oil to the yeast mixture. Mix until a sticky dough forms. This dough should be soft and slightly wet, which helps create the airy texture later.
Step 3: Knead Until Smooth and Elastic
Turn the dough onto a lightly oiled surface and knead for about 8–10 minutes. The dough should become smooth, stretchy, and elastic while remaining soft.
Step 4: First Rise
Place the dough in an oiled bowl, cover, and leave in a warm place for 60–90 minutes. It should double in size, becoming light and airy.
Step 5: Shape and Second Rise
Tip the dough into a generously oiled baking tray and gently stretch it to fit. Press your fingertips into the surface to create deep dimples. Cover and leave to rise again for 30–40 minutes.
Step 6: Add Toppings
Drizzle generously with olive oil, sprinkle with rosemary and flaky sea salt, and gently press toppings into the dimples so they stay in place during baking.
Step 7: Bake Until Golden
Bake in a preheated oven at 220°C (425°F) for 20–25 minutes until puffed, golden, and lightly crisp on the outside.
Step 8: Finish and Cool Slightly
Remove from the oven and brush with a little more olive oil. Let the focaccia cool slightly before slicing to allow the crumb to set.

Common Mistakes to Avoid When Making Jamie Oliver Focaccia Bread
- Using water that’s too hot, which can kill the yeast
- Adding too much flour results in dense bread
- Skipping the second rise
- Not using enough olive oil
- Baking at too low a temperature
What to Serve With Jamie Oliver Focaccia Bread
- Olive oil and balsamic vinegar for dipping
- Soups and stews as a side
- Antipasti platters with cheese and cured meats
- Salads for a light meal
- Sandwich fillings using sliced focaccia
Expert Tips to Get Jamie Oliver Focaccia Bread Just Right
- Keep the dough sticky, not dry
- Use good-quality olive oil for the best flavour
- Press deep dimples to trap oil
- Bake on a hot tray for a better crust
- Finish with oil after baking for shine and softness
How to Add More Flavour to Jamie Oliver’s Focaccia Bread
- Add garlic slices before baking
- Mix herbs into the dough
- Top with olives or cherry tomatoes
- Use infused olive oil
- Finish with parmesan shavings
Is Jamie Oliver’s Focaccia Bread Vegan?
Yes, this focaccia bread is naturally vegan, made without dairy or eggs.
Best Way to Store Focaccia Bread
Store at room temperature in a sealed container for up to 2 days. For longer storage, wrap well and freeze.
Best Ways to Reheat Focaccia Bread
- Oven: Warm at 180°C for 5–7 minutes
- Air fryer: Reheat briefly to restore crisp edges
- Pan: Toast lightly with olive oil
Nutritional Value (Per Serving)
- Calories: ~260
- Carbohydrates: 38g
- Fat: 9g
- Protein: 7g
- Fibre: 2g
FAQs
Why is my focaccia bread dense instead of fluffy?
Focaccia turns dense when the dough is too dry or under-proofed. Using a soft, slightly sticky dough and allowing both rises to fully double in size helps create the airy crumb.
How deep should I press the dimples in focaccia?
Press your fingertips all the way down until they almost reach the tray. Deep dimples help trap olive oil and create the focaccia’s signature texture and flavour.
Can Jamie Oliver’s focaccia bread be made ahead of time?
Yes, focaccia can be baked earlier in the day and reheated before serving. It can also be frozen once cooled, then reheated in the oven for the best results.
Why does focaccia need so much olive oil?
Olive oil prevents the dough from drying out, adds flavour, and helps create a crisp golden crust with a soft interior.
Final Words
Jamie Oliver’s focaccia bread is one of those recipes that rewards patience and good ingredients. With its soft crumb, olive oil richness, and endless topping options, it’s a bread you’ll want to make again once you see how achievable and satisfying the results can be at home.
More recipes to add to your list
PrintJamie Oliver Focaccia Bread

Jamie Oliver’s focaccia bread is an Italian flatbread made from yeast dough, generously enriched with olive oil and baked in a tray. The dough is dimpled before baking, allowing oil and herbs to settle into the surface, giving the bread its distinctive look and flavour.
- Prep Time: 20 minutes (plus rising time)
- Cook Time: 20-25
- Total Time: 11 minute
- Yield: Serves 6
- Category: Dessert
- Method: Baking
- Cuisine: British
Ingredients
-
- 500g strong white bread flour
-
- 7g dried yeast
-
- 1 teaspoon sugar
-
- 1½ teaspoons sea salt
-
- 325ml warm water
-
- 4 tablespoons extra virgin olive oil, plus extra for drizzling
-
- Fresh rosemary leaves (optional)
-
- Flaky sea salt for topping
Instructions
Pour the warm water into a large bowl, add the yeast and sugar, and stir gently. Leave for 5–10 minutes until the surface looks slightly foamy, which shows the yeast is active.
Add the flour, salt, and olive oil to the yeast mixture. Mix until a sticky dough forms. This dough should be soft and slightly wet, which helps create the airy texture later.
Turn the dough onto a lightly oiled surface and knead for about 8–10 minutes. The dough should become smooth, stretchy, and elastic while still remaining soft.
Place the dough in an oiled bowl, cover, and leave in a warm place for 60–90 minutes. It should double in size, becoming light and airy.
Tip the dough into a generously oiled baking tray and gently stretch it to fit. Press your fingertips into the surface to create deep dimples. Cover and leave to rise again for 30–40 minutes.
Drizzle generously with olive oil, sprinkle with rosemary and flaky sea salt, and gently press toppings into the dimples so they stay in place during baking.
Bake in a preheated oven at 220°C (425°F) for 20–25 minutes until puffed, golden, and lightly crisp on the outside.
Remove from the oven and brush with a little more olive oil. Let the focaccia cool slightly before slicing to allow the crumb to set.