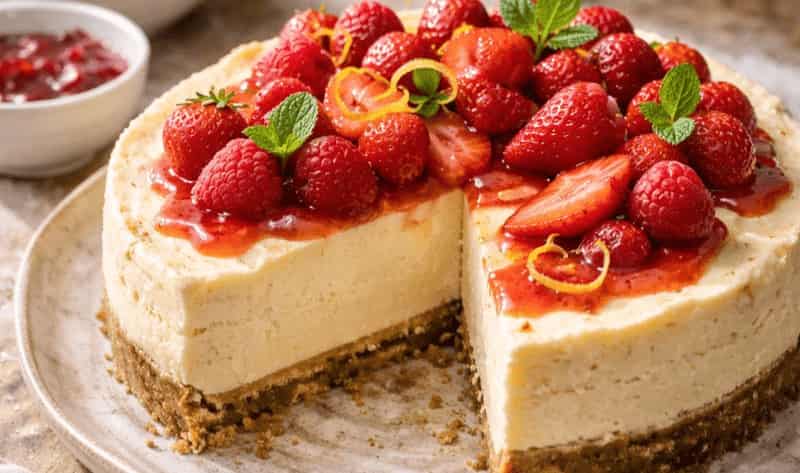
Jamie Oliver Air Fryer Cheesecake is a smart, modern way to make a classic dessert without turning on the oven. The air fryer provides steady heat that sets the cheesecake gently, giving you a smooth, creamy centre and a lightly golden top. It’s ideal when you want a smaller cheesecake with reliable results and less waiting around.
This recipe serves 4–6 people and takes about 50–55 minutes, including chilling time. Below is a detailed, step-by-step guide so the texture stays silky and the base holds together cleanly.
What Makes This Recipe Worth Making
- Quick and efficient – no full-size oven needed
- Creamy, smooth texture – gentle air fryer heat helps
- Perfect small-batch dessert – ideal for everyday treats
- Simple ingredients – easy to find and work with
- Reliable results – controlled cooking environment
What Is Jamie Oliver Air Fryer Cheesecake?
Jamie Oliver Air Fryer Cheesecake is a baked-style cheesecake prepared in a small tin and cooked in an air fryer. It uses a classic biscuit base with a cream cheese filling that sets softly rather than baking dry or cracking.

Similar recipes to add to your list
- Jamie Oliver Air Fryer Scones
- Jamie Oliver Chicken and Leek Stroganoff
- Jamie Oliver Chicken Thighs and Rice
Jamie Oliver Air Fryer Cheesecake Ingredients List
- 150 g digestive biscuits
- 60 g unsalted butter, melted
- 300 g full-fat cream cheese
- 100 ml double cream
- 80 g caster sugar
- 1 large egg
- 1 teaspoon vanilla extract
- Zest of ½ lemon
How to Prepare Jamie Oliver Air Fryer Cheesecake – Simple Steps
Step 1: Prepare the tin
Line the base and sides of a small round cake tin (that fits your air fryer basket) with baking paper. This makes removal easier and keeps the edges neat.
Step 2: Make the biscuit base
Crush the digestive biscuits into fine crumbs using a food processor or rolling pin. Mix with the melted butter until evenly coated. Press the mixture firmly into the base of the tin, using the back of a spoon to compact it well. Chill in the fridge for 10 minutes to firm up.
Step 3: Prepare the filling
In a bowl, beat the cream cheese until smooth. Add the sugar and mix until combined. Stir in the egg, vanilla extract, lemon zest, and double cream. Mix gently until smooth and creamy, avoiding overmixing to keep air out.
Step 4: Fill the tin
Remove the base from the fridge and pour the cheesecake mixture over it. Tap the tin lightly on the work surface to release any trapped air bubbles.
Step 5: Preheat the air fryer
Preheat the air fryer to 160°C for 3 minutes. This ensures even cooking from the start.
Step 6: Cook the cheesecake
Place the tin into the air fryer basket. Cook for 25–30 minutes, until the edges are set but the centre still has a gentle wobble. Avoid opening the basket too often, as sudden heat changes can affect texture.
Step 7: Cool gradually
Turn off the air fryer and leave the cheesecake inside with the door slightly open for 5 minutes. This gradual cooling helps prevent sinking.
Step 8: Chill before serving
Remove the cheesecake and allow it to cool fully at room temperature, then refrigerate for at least 2 hours. Chilling firms the texture and improves flavour.
Common Mistakes to Avoid When Making Jamie Oliver’s Air Fryer Cheesecake
- Overmixing the filling – introduces air and causes cracking
- Cooking at high heat leads to a dry texture
- Skipping chilling time – cheesecake won’t set properly
- Removing too early – centre needs a gentle wobble, not liquid
What to Serve With Jamie Oliver’s Air Fryer Cheesecake
- Fresh berries – light and refreshing
- Fruit compote – adds sweetness
- Whipped cream – simple and smooth
- Lemon zest sprinkle – bright finish
Expert Tips to Get Jamie Oliver’s Air Fryer Cheesecake Right
- Use full-fat cream cheese – best texture
- Bring ingredients to room temperature – smoother filling
- Line the tin well – easier release
- Let it wobble slightly – it sets while chilling
How to Add More Flavour to Air Fryer Cheesecake
- Vanilla bean paste – deeper aroma
- Orange or lime zest – fresh twist
- Chocolate swirl – richer finish
- Biscuit crumb topping – extra texture
Best Way to Store Air Fryer Cheesecake
- Cover loosely once chilled – prevents drying
- Refrigerate – keeps fresh up to 3 days
- Keep away from strong smells – cream absorbs odours
Best Ways to Serve Air Fryer Cheesecake
- Serve cold – clean slices and best texture
- Rest at room temperature briefly – softer mouthfeel
- Use a warm knife – neat cuts
Nutritional Value (Per Serving)
- Calories: ~420 kcal
- Carbohydrates: ~28 g
- Protein: ~7 g
- Fat: ~32 g
FAQs
Why Is My Air Fryer Cheesecake Cracked on Top?
Cheesecake cracks when it’s cooked at too high a temperature or the filling is overmixed. Keeping the air fryer temperature low and mixing the batter gently helps the cheesecake set smoothly without breaking.
How Do I Know When Air Fryer Cheesecake Is Done?
The cheesecake is ready when the edges are set but the centre still has a slight wobble. It will continue to firm up as it cools and chills, giving the right creamy texture.
Can I Use Any Cake Tin for Air Fryer Cheesecake?
You should use a small tin that fits comfortably inside the air fryer basket with space around it for air circulation. Loose-bottom or springform tins work best for easy removal.
How Long Should Air Fryer Cheesecake Chill Before Serving?
Chilling for at least 2 hours is essential. This allows the cheesecake to fully set, develop flavour, and slice cleanly.
Final Words
Jamie Oliver’s Air Fryer Cheesecake shows how a classic dessert can be made simply and efficiently at home. With careful mixing, gentle heat, and proper chilling, you get a creamy, balanced cheesecake that feels thoughtful without being complicated.
Printjamie oliver air fryer cheesecake

Jamie Oliver Air Fryer Cheesecake is a baked-style cheesecake prepared in a small tin and cooked in an air fryer. It uses a classic biscuit base with a cream cheese filling that sets softly rather than baking dry or cracking.
- Prep Time: 15
- Cook Time: 30
- Total Time: 45 minutes
- Yield: 8 1x
- Category: Dessert
- Method: Air Frying
- Cuisine: British
Ingredients
-
- 150 g digestive biscuits
-
- 60 g unsalted butter, melted
-
- 300 g full-fat cream cheese
-
- 100 ml double cream
-
- 80 g caster sugar
-
- 1 large egg
-
- 1 teaspoon vanilla extract
-
- Zest of ½ lemon
Instructions
Line the base and sides of a small round cake tin (that fits your air fryer basket) with baking paper. This makes removal easier and keeps the edges neat.
Crush the digestive biscuits into fine crumbs using a food processor or rolling pin. Mix with the melted butter until evenly coated. Press the mixture firmly into the base of the tin, using the back of a spoon to compact it well. Chill in the fridge for 10 minutes to firm up.
In a bowl, beat the cream cheese until smooth. Add the sugar and mix until combined. Stir in the egg, vanilla extract, lemon zest, and double cream. Mix gently until smooth and creamy, avoiding overmixing to keep air out.
Remove the base from the fridge and pour the cheesecake mixture over it. Tap the tin lightly on the work surface to release any trapped air bubbles.
Preheat the air fryer to 160°C for 3 minutes. This ensures even cooking from the start.
Place the tin into the air fryer basket. Cook for 25–30 minutes, until the edges are set but the centre still has a gentle wobble. Avoid opening the basket too often, as sudden heat changes can affect texture.
Turn off the air fryer and leave the cheesecake inside with the door slightly open for 5 minutes. This gradual cooling helps prevent sinking.
Remove the cheesecake and allow it to cool fully at room temperature, then refrigerate for at least 2 hours. Chilling firms the texture and improves flavour.

